0

Learning Processing 4

processing4_00003 processing4_00087 processing4_00108

Unfortunately due to a family emergency I couldn’t make the workshop this week however I caught up with the work. The following is this workshop’s content.

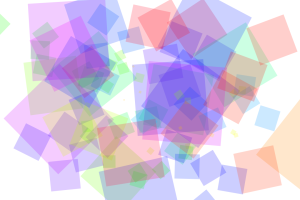
The workshop expanded upon using functions as seen below but instead of making a vector as beforehand we learnt to load images in and manipulate them – in this case making each pixel move; which makes me think we could pull certain pixels out using functions which would be very interesting for me. In this occasion the images’ pixels move randomly upon a range of 75% of the pixel size. Also upon right click the second image merges into and then replaces the original.

Image manipulation is a huge part of coding, making an image in Illustrator or Photoshop has significant benefits over coding it from scratch and to manipulate these is a big step up so the workshop really helped in this respect. For my project I will be looking at using images and having a very graphic based design. With this.the workshop has significantly helped for my installation.

PImage img1;
PImage img2;

void setup(){
img1 = loadImage(“batman_251.jpg”);
img2 = loadImage(“batman_404.jpg”);
background(0);
size(img1.width, img1.height);
}
PImage imgs[] = {img1,img2};

int s = 5;

void draw(){
img1.loadPixels();
for(int y =0; y<height; y=y+s){
for(int x =0; x<width; x=x+s){

int loc = x + (y*width);
color c = img1.pixels[loc];
//noStroke();
stroke(c,100);
fill(c,20);
rect(x+random(-1,10),y+random(-1,10),s*.75,s*.75);
}
}

fill(255,75);
textSize(50);

if(mousePressed && mouseButton == RIGHT || keyPressed){
img1=loadImage(“batman_404.jpg”);
text(“#404”, width/3,height-10);
} else {img1=loadImage(“batman_251.jpg”);
text(“#251”, width/3,height-10);
}
}

0

Learning Processing 3

processing3_00056 processing3_00090

In the third processing workshop we learned functions and frame saving. Functions is a key part of coding however it is not one that I enjoy, my lecturer went very fast through this and made it hard to remember while I feel the processing workshop was very necessary the amount of numbers and letters (which is essentially functions) was quite overwhelming. I went away and then looked over it several times to try and understand it a bit more as there was so much to it that it became confusing what each one did.

From this I learnt that names for functions such as c isn’t helpful and instead clr for colour would be much more suitable. However now I understand the functions and using a colour palette (in which was something I tried to research) I feel a lot more confident with processing more complicated pieces.

void setup (){

size (800,400);
}

color[]plt = {#225378,#1695A3,#ACF0F2,#F3FFE2,#EB7F00};
int rot = 0;

void draw (){
saveFrame(“processing3_#####.png”);
translate(width/2,height/2);
rotate(rot);
for(int i=0; i<width; i=(i+40)){ house(i,20,4); };
rot=rot+1;
}

void house(int x, int y, int r){

color cl=plt[int(random(r))];

fill(cl,50);

noStroke();

triangle(x+15,y,x,y+15,x+30,y+15);

rect(x,y+15,30,30);

rect(x+12,y+30,10,15);

fill(255,255,255);

noStroke();

ellipse(mouseX/3,y,40,40);

}

0

Design Iterations – Poster Project

With an impending project to design an interactive display in the foyer of Weymouth House; the media department of Bournemouth University, we looked at the iterative processes of design over the last few weeks. We started by looking at the different design processes and while there were many of merit I found during the project that the whirlpool technique was the most relevant when it came to our poster. The step technique was very straight forward and didn’t really represent how design worked factoring in improvements and reviews half way through the project.

10694832_10204777893786042_260031851_n

The poster was pitched by my lecturers and was inspired by the Scottish Independence vote but instead of Scotland the aim was to make posters for Dorset. We then researched the Scottish posters and looked at what it meant to be from Dorset and what is the iconography of the county. On this I thought the brief was very limited, all iconography was very limited and the first version we planned out and spoke to Liam about suffered from this. I really started to doubt the brief at this point, the scope of what we could do was very limited and already similarities were appearing between groups’ ideas.

Due to this there were only two ways to go in my opinion –

  1. Green Party root – Nature needs protecting
  2. Monetary root

Upon a discussion our first idea was to do a car (design below) and highlight that Dorset is a key part to Britain but often overlooked. However upon review with peers this design wasn’t clear and after we analysed the space we noticed that people don’t really stop to look at anything apart from a glance. The fast moving nature of the space meant that meanings had to be simple and to the point without much thought for decryption. Due to this writing had to be pretty big and not contain a lot of words else it wouldn’t be fully read. The space was very busy and people walking through it never really looked at much unless it was a glance at a screen when walking in or the food on sale. Short, concise posters with a meaning would be better and after many trial and errors we came up with two ideas.


dorset_poster_2 10723606_10154689691600363_1702420118_n


Researching campaign posters we found lots of text-based imagery and with this striking points so we delved into what Bournemouth had over Britain. The research aspect of this helped a lot in my understanding of iterative design as it allowed me to shape my opinion on design over what the core ideas that were established.

In the end we went with the second poster and this was very striking when it was put up and it attracted the eyeline of many people who glanced at it and then proceeded to read over it.

IMG_5817


Overall I found the project very useful. The practical element allowed me to explore the space that I will be working with and come to conclusions on which screens to use and what the installation must be like. As well as this I found it helpful to understand that iterative design isn’t just straight forward and reviews are done at each stage. I kind of knew this already but this project allowed me to focus on it in more depth.


During the project I found out this about the space:

  1. It is very fast moving, heavily text based installations won’t work.
  2. The main points of interest are the screens by the doors.
  3. People won’t stop to interact, they are always rushing to get to lectures/workshops.
0

Learning Processing 2

On my second workshop for processing we learnt some very handy and useful tools that will contribute towards understanding what is needed for an interactive project. This workshop was very enjoyable and I couldn’t wait to sink my teeth in again to Processing and as soon as I got home I did that.

While unlike last week I won’t share the code created during the WorkShop I will show my culumination of the workshop in which combines the 3 parts we learnt. These are:

– Saving out into an image

– Mouse Clicks

– Using Integers to randomise colours/size and loops.

The mouse click was very reminiscent of paint but then got more complicated introducing loops and opacity to create some abstract art. After this we learnt how to make pattern loops which were good but I didn’t see the use for them, however they looked good yet I craved more interaction. This led me to playing around and I made the spin happen upon what a mouse click. Taking this further I researched changing colours upon a click instead of it being random as it moves.  I was very happy with this, it was fun to play with as well as code and it created interesting designs with ease. With the inclusion of the save function too I have attached two examples below.

processing_image_15102014

processing_image_15102014

I decided to change the shape from a triangle to a rectangle though I also tried a circle

and preferred this as demonstrated below.

processing_image_15102014processing_image_15102014

processing_image_15102014

Overall I am still very much enjoying processing and find the coding simple and easy to pick up and with the help of the internet there are plenty of guides out there to easily pick up new techniques.

Please find below the code I made:

void setup(){
size(1080,720);
colorMode(HSB,100);
background(#ffffff);
frameRate(50);
}

int rt=0;
int sz=1;
int cl=0;

void draw(){
if(mousePressed){
if(mouseButton == LEFT){
fill(cl,255,255,20);
noStroke();
translate(mouseX,mouseY);
rotate(rt);
rect(0,0,sz,sz);
}

if(mouseButton == RIGHT){
cl+=10;
cl%=255;
}

else {
save(“processing_image_15102014.png”);
}
}

sz=(sz+2)%300;
rt=rt+4;
cl=(cl+1)%100;
}

0

Learning Processing 1

As part of my University course and to get into Java I am learning Processing. Admittedly I was sceptical about this at first however I found this very fun and went away from the Workshop excited and eager to learn more. I learnt the basics of Processing and found it very similar to Javascript and CSS and I feel this helped with the learning curve. The codes were simple but showed an effect and the outcome was impressive to me for such a short space of time given my limited knowledge on it beforehand. I thoroughly enjoyed learning how to make processing draw shapes and lines as well as manipulate them through the size using a random value or a responsive amount such as height/2. During the lesson we explored using the mouse to manipulate where the lines were drawn and I went away and searched how to make something active or inactive upon a mouse click.

Untitled-1

An image showing the lines reacting to the mouse movement to draw (background removed for demonstration purposes).

I found it all very straight forward to manipulate as opposed to when I first learned HTML and CSS. The fact the commands are straight forward without much formatting made a difference in terms of enjoyment. I also like the complexity that can come, hooking into the Twitter API or making Motion Capture displays sounds really interesting and I cannot wait to dive into it.

The code after Lesson 1 is below:

void setup () {

size(640,400);

frameRate(60);
}
void draw() {
background(255);
//this is a point
strokeWeight(5);
stroke(255);
//point(random(0,width),random(0,height));
//this is a line
stroke(random(100,255),random(100,255),random(100,255));
strokeWeight(2);
line(mouseX,mouseY,random(0,width),random(0,height));
//this is a circle
strokeWeight(1);
stroke(random(0,255),random(0,255),random(0,255));
noFill();
//ellipse(random(0,width),random(0,height),100,100);
}